The story of how our family got hooked on Ebelskiver starts with an infomercial and a determined little boy.
A few years ago Max became obsessed with getting a Pancake Puff Pan he had seen on an infomercial. He wouldn't let it go! Anywhere we went that had an "As Seen On TV" section, Max would run over and beg us to get the pan.
We didn't bite ...until we happened across the cast iron Lodge Ebelskiver pan. What in the world is Ebelskiver??? We were intrigued, so finally Max was going to get his wish of getting to eat a pancake in puff form.
Ebelskiver are a Danish treat that due to the Pancake Puff pan and Williams and Sonoma have gained popularity in the United States. This recipe is not a traditional recipe more pancake than puff but is absolutely delicious!
Warning: This is a more involved pancake process than you are probably accustomed to but are so delicious that you won't be able to make them any other way from now on!
adapted from the Cook's Illustrated Pancake recipe
Ingredients:
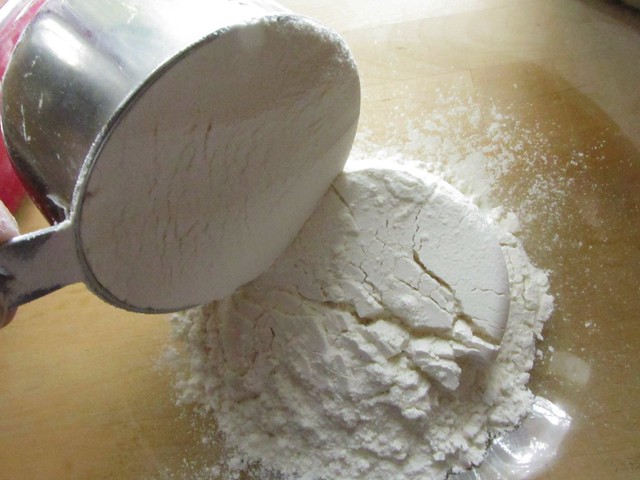
2 cups flour
1 tsp Kosher Salt
1/2 tsp Baking Soda
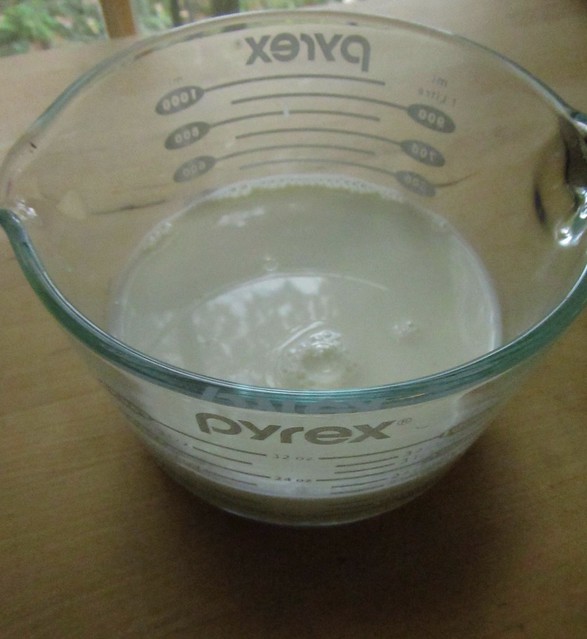
2 Eggs, separated
1 3/4 cup milk
6 Tb Butter, unsalted
Unusual Equipment:
Ebelskiver pan (although this batter works great as a regular pancake too.)
Chopsticks
Directions:
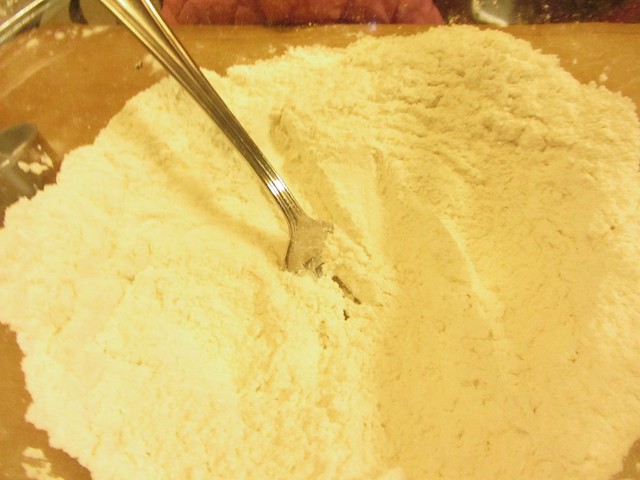
1. Put cast iron Ebelskiver pan on medium heat while putting together batter. In a large mixing bowl combine flour, salt and baking soda. Mix to combine.
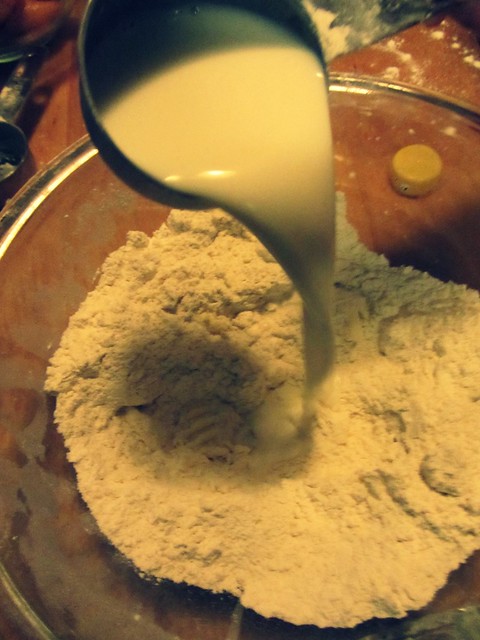
2. Measure out your milk and add separated egg yolks to milk. (put your separated egg whites into a clean, dry metal bowl that is bigger than you think you need)
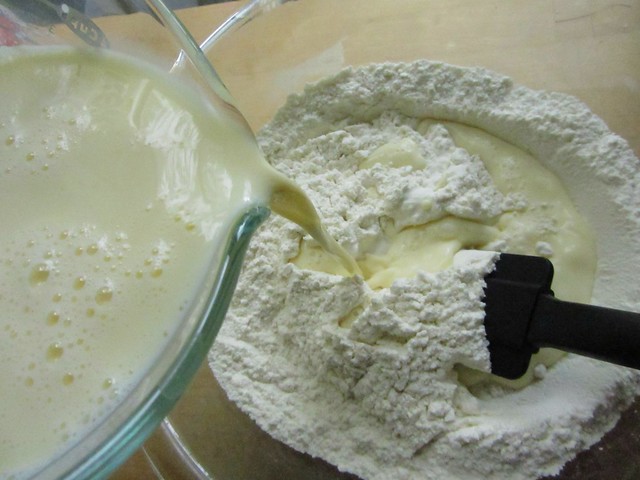
3. Add your milk mixture to the flour mixture. Gently fold liquid in. About 10 stirs should do it.
4. Whip the egg whites until you have soft peaks and then gently fold into the batter.
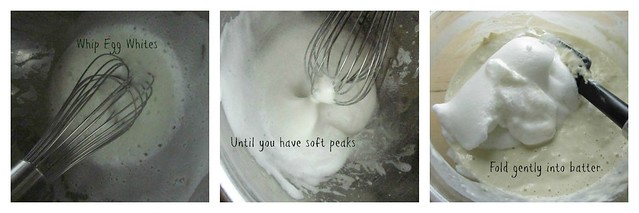
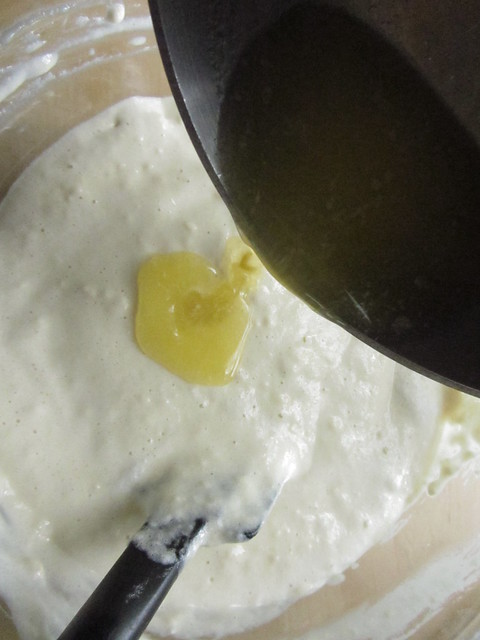
5. Melt 4 TB of butter and fold into the batter last.
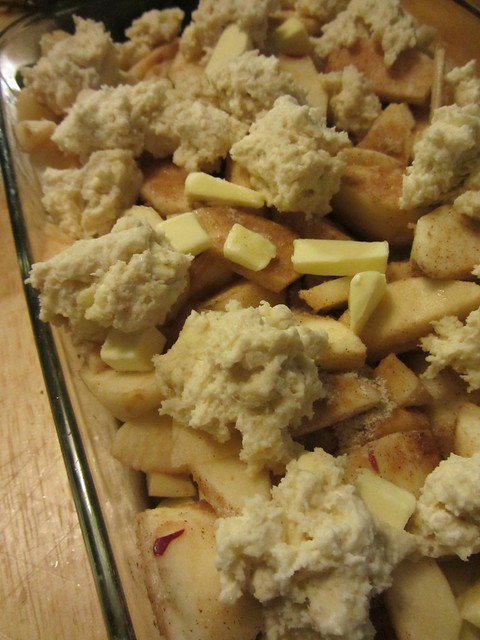
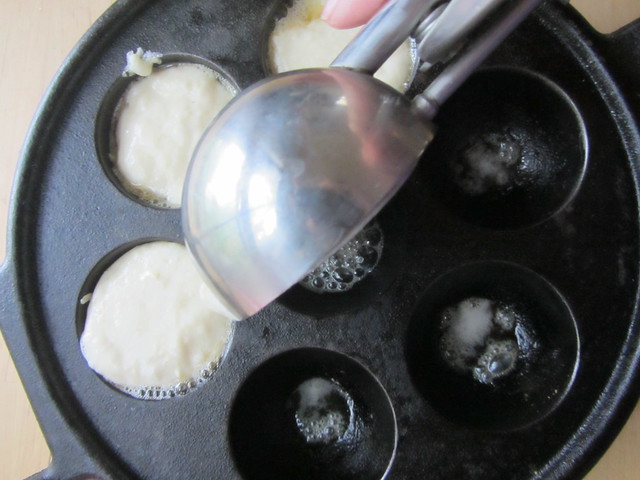
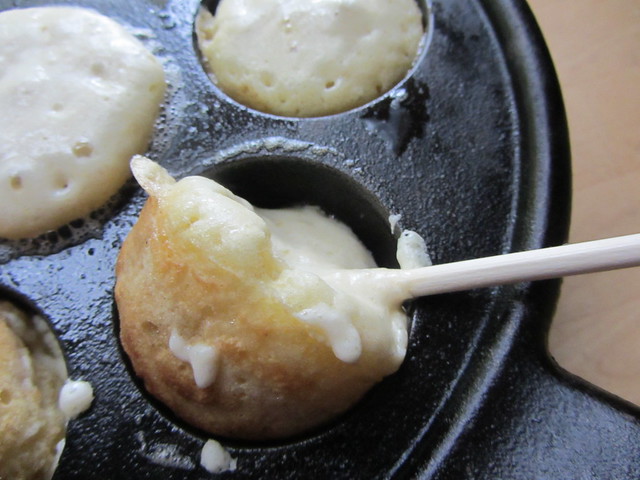
6. Cut the remaining 2 TB of butter into 7 little pats and put into the hot pan. Quickly after start scooping in batter. (If you are interested in filling the puffs then fill halfway, put in your filling then cover with batter.)
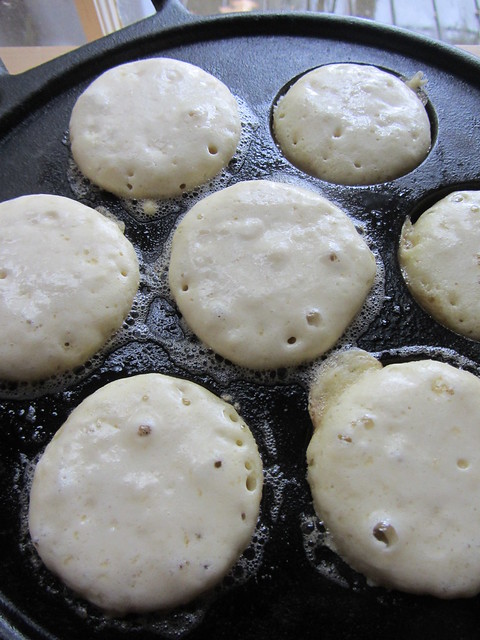
7. The key to a successful flip is making sure the bottom is cooked enough. You want to wait until the bubble holes on the top of the pancake pop and stay open. (This is also a helpful trick when making regular pancakes)
8. Using your chopsticks (or knitting needles if you're really old school) start to push on the side of a puff. It should slide out with a formed pancake cup on the bottom. Flip this cup over having the rest of the batter in the cup to come out.
Note: This is a technique that might take you a minute to get. I suggest not making these for a group the first time you try. The first batch gets a little mangled until you get the hang of it.

8. Continue to flip over the rest of the puffs and cook a few more minutes on the other side until puff is completely browned. You don't need to do anymore flips but I tend to because I'm impatient!
9. Once done just take the pan and pop out the puffs into a bowl. While you are finishing the batch cover the bowl with a tea towel to keep the puffs warm.
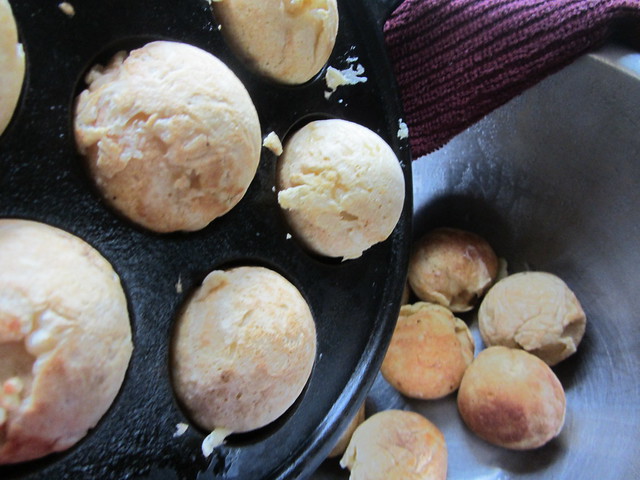
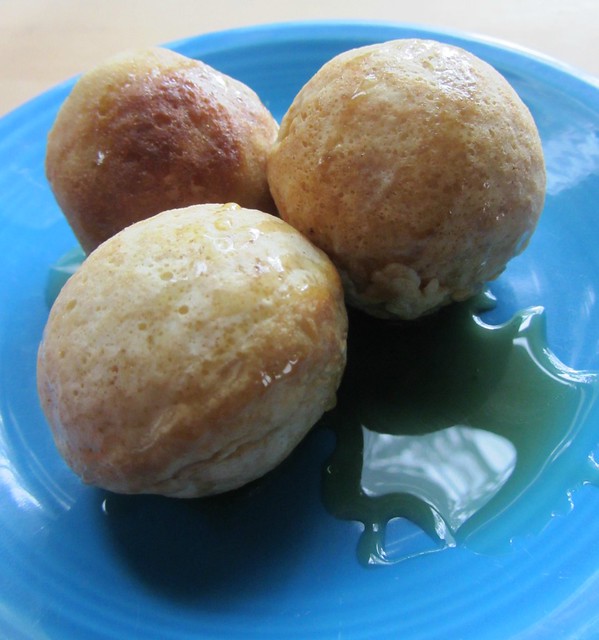
10. Without filling and using the Lodge pan, you'll get 21 puffs (3 batches)! You don't need to rebutter the wells for the additional batches, just the first one. After you end up with a big bowl of pancake fun...the only thing left is to top with syrup and enjoy!!
(If you're wondering Grade B is my favorite)
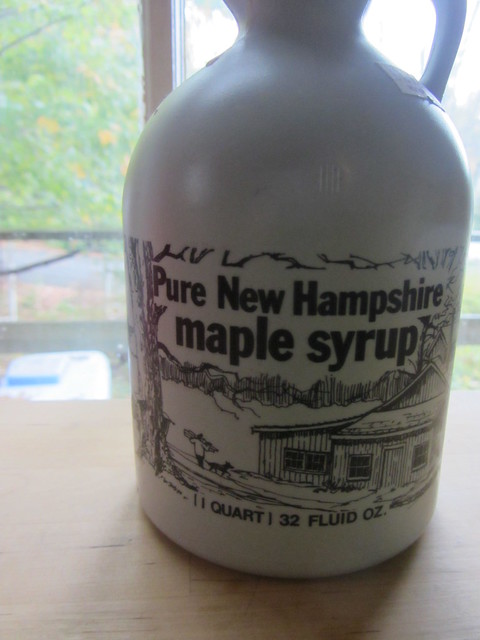
(What up Vermont??)